Are you or someone you know expecting a bundle of joy? Are you looking for a fun theme for your Gender Reveal party? I have the perfect DIY Gender Reveal Party Decor made to match the”Let’s Sip & Sea What It Will Be” party I styled for Cricut recently. I’m excited to share how you can recreate this easy gender reveal party decor and apply the technique for any themed party!
This post has been sponsored by Cricut. I was invited to participate in the Cricut Party Blogger Program Kickoff. Some products provided by Oriental Trading Company (OTC). All thoughts and opinions are my own. #PartyWithCricut #CricutMade
Let’s get started!
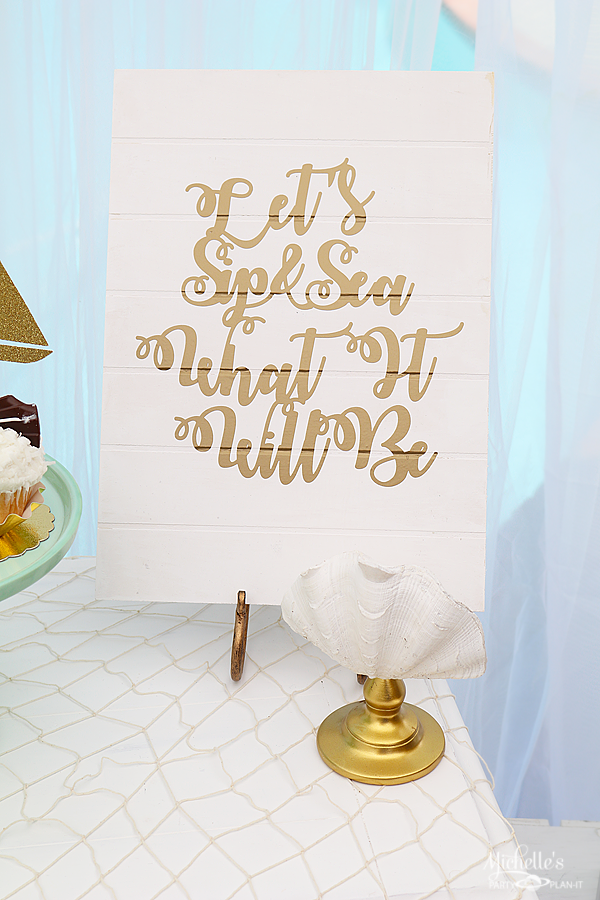
Let’s Sip & Sea What It Will Be Gender Reveal Party Decor | Party with Cricut

- Cricut Explore Air 2™
- Cutting Mat
- Cricut Vinyl
- Cricut Transfer Tape
- Cricut Tools
- DIY Slat Sign
- White Paint
- Paint Brush
If you are new to Cricut, be sure to check out my video for cutting vinyl with your Cricut. It’s great for beginner crafters!

Step 1:
With a craft brush, apply one layer of white paint to the DIY Slat Sign and let dry.

Step 2:
Open Cricut Design Space and start a new project. I’ve saved the design for you HERE. If you use this file, simply upload the design and skip to step 5. Otherwise, follow on to create your own text…..

Step 3:
To add text to your design, click the Insert Text button and type the text in the box. Change the text by selecting your desired font from the drop down menu. I selected October Twilight (a free font I have on my laptop).
Step 4:
Click on the Edit tab to decrease the space between the letters. Right click and select “isolate letters” to move them around freely. Be sure each letter and punctuation mark is connected to another letter in someway, so you can Weld them together. Welding connects the letters so that the design is one continuous cut. Once you are happy with the spacing, click the Weld icon.

Step 5:
When you are ready to cut, turn the dial to select the Vinyl setting.
Step 6:
Next, apply the vinyl to the mat with the right side facing up. Load the mat into the Cricut by pushing the arrow button.

Step 7:
Once the mat is loaded you can click the GO button in Design Space and the file will be sent to the Cricut via bluetooth. Click the lit Cricut button on the machine to start cutting.
Step 8:
Once the design is cut, push the arrow button to unload the mat. Remove the vinyl from the mat, leaving the cut design.

Step 9:
Using your Cricut Tools; weed the vinyl to remove the little pieces in between the letters.

Step 10:
Cut a piece of Transfer Tape close to the same size of the design and remove the paper backing. Apply the transfer tape on top of your design.
Step 11:
Using a burnish tool, rub the Transfer Tape firmly on top of the vinyl. And slowly pull back the Transfer Tape. The design will then come off the paper backing for easy application.
Step 12:
Center your design on your painted slat sign and apply the vinyl. Rub the Transfer Tape firmly with the burnish tool and slowly remove the Transfer Tape. Be sure to rub the vinyl in between the slats as well. This will leave a nice and clean design!
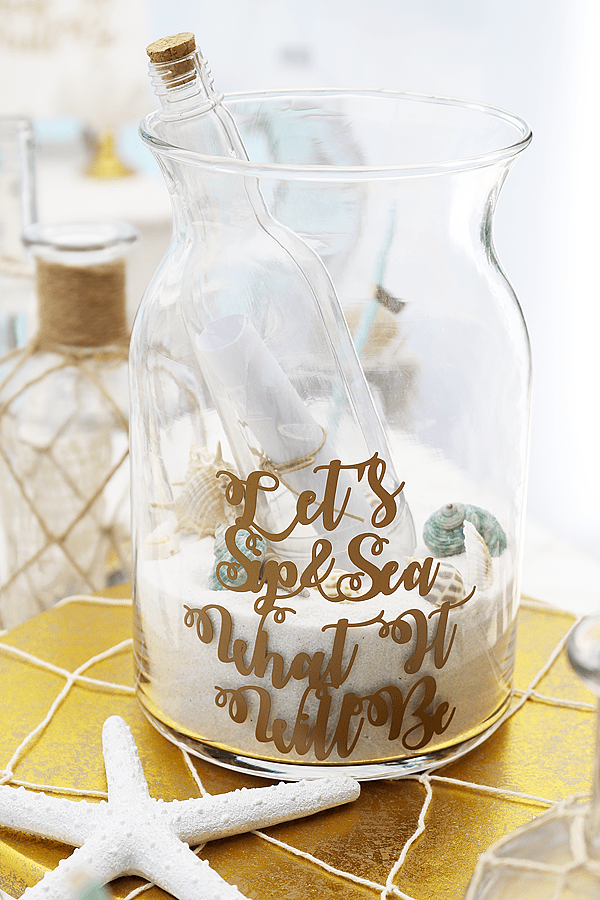
I also another smaller version and applied it to a glass vase using the same basic technique. I filled it with sand, seashells and a message in the bottle from OTC. The message concealed the “big reveal”!

Looking for more Gender Reveal Ideas? Check out all the beautiful details from my “Let’s Sip & Sea What It Will Be” Gender Reveal Party. So many fun Nautical ideas plus other crafts I made with my Cricut Explore Air2!
Happy Crafting!

PIN FOR LATER!


- How to Make a Mini Vinyl Record Album with Cricut
- How to Make a Disney Vacation Fund Box with a 3D Printer
- How to Make a USA 250 Sublimation Mug with the Cricut Mug Press
- Review of the Transpro Plus 16×20 Heat Press
- It’s A Harry Potter Christmas Tree!
- Mad Scientist Halloween Party For Teens
- Wild and Free Cactus Party Ideas
- Cutting Vinyl with Cricut Explore Air 2™ – Beginner Craft
- Yellow & Pink Lemonade Party | Summer Party Ideas
- EASY Not So Spooky Halloween Party Ideas with Fanta and OREO
- Black and Gold Halloween Party Ideas
- Shark Party Ideas | Summer Celebrations